
Step 1
Create a new 1500 x 950 px document, and set the Resolution to 300.Go to File > Place Embedded, and open the BrickOldRounded0061 image. Resize it as you like, and then tap the Return key to accept the changes.

Step 2
Click the Create new fill or adjustment layer icon at the bottom of the Layers panel and choose Levels.
Step 3
Click the Clip adjustment to layer icon at the bottom of the Properties panel, and then change the Shadows value to 85.
Step 4
Click the Create new fill or adjustment layer icon again and choose Hue/Saturation. Click the Clip adjustment to layer icon at the bottom of the Properties panel, and then change the Saturation to 11, and the Lightness to -83.
2. Creating the Text
Step 1
Create the text in All Caps using the font Beon Medium. The color is#a33e88 and the Size is 103 pt.
Step 2
Duplicate the text layer and make it invisible by clicking the eye icon next to it. Then right-click the copy and choose Rasterize Type.What we'll be doing next is separating the vertical and diagonal parts of the letters from the horizontal ones, in order to apply the effects using different Angle values.

Step 3
Pick the Rectangular Marquee Tool (or any selection tool you like), click the Add to selection icon in the Options bar, and select all the horizontal parts of the letters you have.
Step 4
Go to Edit > Cut, and then Edit > Paste Special > Paste in Place. This will place the selected parts in a separate layer. Rename the layers to Vertical and Horizontal.
Step 5
Change both the Vertical and Horizontal layers' Fill values to 0.
Step 6
Duplicate each of the Vertical and Horizontal layers twice, and then place each set of layers in a group that has its name (Vertical/Horizontal).
Step 7
Place the Horizontal group below the Vertical one.
3. Styling the Original Horizontal Layer
Double-click the original Horizontal layer to apply the following layer style:Step 1
Add a Bevel and Emboss with these settings:- Size: 10
- Uncheck the Use Global Light box
- Angle: 0
- Altitude: 70
- Check the Anti-aliased box
- Highlight Mode: Linear Light
- Shadow Mode - Opacity: 0%

Step 2
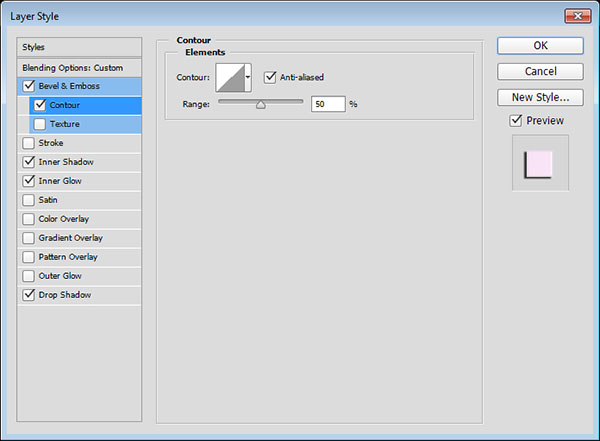
Add a Contour with these settings:- Check the Anti-aliased box.
Step 3
Add an Inner Shadow with these settings:- Blend Mode: Screen
- Color:
#e658d4 - Angle: 30
- Distance: 0

Step 4
Add an Inner Glow with these settings:- Opacity: 85%
- Color:
#fe66f1 - Source: Center
- Size: 18

Step 5
Add a Drop Shadow with these settings:- Distance: 13
- Size: 7


4. Styling the First Copy Horizontal Layer
Double-click the first copy Horizontal layer to apply the following layer style:Step 1
Add a Bevel and Emboss with these settings:- Size: 16
- Uncheck the Use Global Light box
- Angle: -36
- Altitude: 42
- Contour: Cove - Deep
- Check the Anti-aliased box
- Highlight Mode: Vivid Light
- Shadow Mode - Opacity: 0%

Step 2
Add a Contour with these settings:- Contour: Cone - Inverted
- Check the Anti-aliased box


5. Styling the Second Copy Horizontal Layer
Double-click the second copy Horizontal layer to apply the following layer style:Step 1
Add a Bevel and Emboss with these settings:- Size: 16
- Uncheck the Use Global Light box
- Angle: 18
- Altitude: 58
- Contour: Half Round
- Check the Anti-aliased box
- Highlight Mode: Vivid Light
- Shadow Mode - Opacity: 0%

Step 2
Add a Contour with these settings:- Contour: Sawtooth 2
- Check the Anti-aliased box

Step 3
Add an Inner Glow with these settings:- Blend Mode: Linear Light
- Noise: 5%
- Color:
#ffdcfa - Source: Center
- Size: 38

Step 4
Add an Outer Glow with these settings:- Color:
#7f2d65 - Size: 15


6. Styling the Original Vertical Layer
Step 1
Right-click the original Horizontal layer, choose Copy Layer Style, and then right-click the original Vertical layer, and choose Paste Layer Style.Double-click the original Vertical layer to adjust the Bevel and Emboss's Angle and Altitude values, by changing them to 90 and 74.

Step 2
For the Inner Glow, just change the Size to 15.

7. Styling the First Copy Vertical Layer
Copy and paste the first copy Horizontal layer's layer style to the first copy Vertical layer, and then double-click the Vertical copy layer to change the Bevel and Emboss effect's Angle to -76, and its Altitude to 53.

8. Styling the Second Copy Vertical Layer
Copy and paste the second copy Horizontal layer's layer style to the second copy Vertical layer, and then double-click the Vertical copy 2 layer to change the Bevel and Emboss effect's Angle to -82, and its Altitude to 53.

9. Adding More Glow and Creating the Cable
Step 1
Create a new layer below the original invisible text layer, call it Background Light, and change its Blend Mode to Linear Light.Set the Foreground color to
#98338b, pick the Brush Tool, and choose a very big, soft, round tip. Then click once to add spots of color behind the text (don't click and drag, just dot the color).
Step 2
Create another new layer below the Background Light layer and call it Cable. Pick the Pen Tool and choose the Path option in the Options bar.What you'll need to do next is create the paths where you want to add the cable. You can click to add corner anchor points, and click and drag to create curves. Keep in mind that the path created doesn't have to be perfect, as you can pick the Direct Selection Tool at any time later to adjust the anchor points or the direction handles.

Step 3
To separate the paths, press and hold the Command key, and click outside the path you've finished creating so that it won't be connected to the path you create after it.
Step 4
Take your time with this step to get a neat outcome.
Step 5
Pick the Brush Tool, and then open the Brush panel (Window > Brush), and choose a hard round 7 px tip with Spacing set to 1.
Step 6
Set the Foreground color to#252525, pick the Direct Selection Tool, right-click the path and choose Stroke Path.
Step 7
Choose Brush from the Tool dropdown menu and uncheck the Simulate Pressure box.
Step 8
This will stroke the path. Hit the Return key to get rid of the work path.
10. Styling the Cable
Double-click the Cable layer to apply the following layer style:Step 1
Add a Bevel and Emboss with these settings:- Check the Anti-aliased box
- Highlight Mode: Vivid Light
- Color:
#ec6ab7 - Opacity: 24%

Step 2
Add a Contour with these settings:- Check the Anti-aliased box.

Step 3
Add a Pattern Overlay with these settings:- Blend Mode: Multiply
- Pattern: 8

Step 4
Add a Drop Shadow with these settings:- Opacity: 60%
- Distance: 13
- Size: 10


11. Creating the Clips
Step 1
Pick the Rectangle Tool and create an 11 x 15 px rectangle.
Step 2
Pick the Add Anchor Point Tool and click to add two points in the center of both vertical sides of the rectangle.
Step 3
Pick the Direct Selection Tool, click and drag to select the center points you added, and then press the Left Arrow Key once to move them 1 px to the left.
Step 4
Duplicate the Rectangle layer and then go to Edit > Transform > Rotate 90° Clockwise. Rename the Rectangle layers to H (for horizontal) and V (for vertical).
12. Styling the Clips
Double-click the H layer to apply the following layer style:Step 1
Add a Gradient Overlay with these settings:- Opacity: 42%
- Click the Gradient box to create the gradient using the colors
#151515to the left,#6d6d6din the center, and#161616to the right.

Step 2
Add a Drop Shadow with these settings:- Opacity: 60%
- Distance: 13
- Size: 10


Step 3
Copy and paste the H layer's layer style to the V layer, and then double-click the V layer to change the Gradient Overlay's Angle value to 0.
Step 4
Next, duplicate and place the clip layers wherever you want to add clips to the cable you created.
13. Adding One More Coloring Layer
Click the Create new fill or adjustment layer icon and choose Solid Color. Use the color#a34799, place the adjustment layer below the Cable layer, and change its Blend Mode to Vivid Light. This will apply the color to the bricks behind the text, and enhance the glow and lighting of the final result.
No comments:
Post a Comment